Fuller Lips
Remove Creases
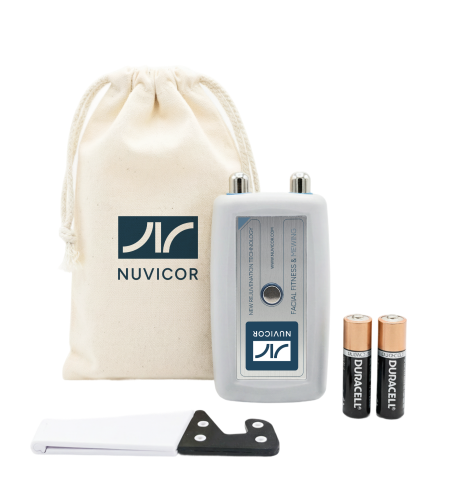
Nuvicor device for increasing
lips volume and reduction of purse-string wrinkles
lips volume and reduction of purse-string wrinkles

Increasing Lip Volume and Eliminating Purse-String Wrinkles
The Lips and Aging Signals
The lips are formed by a large muscle that encircles the mouth like a ring, as shown in Fig. 1.
As we age, this muscle loses its volume. This causes the lips to become thinner, lose their fullness, and lose their defined contour. Additionally, this loss of muscle volume leads to the formation of vertical lip lines (smoker's lines), as the excess skin begins to gather into folds.
As we age, this muscle loses its volume. This causes the lips to become thinner, lose their fullness, and lose their defined contour. Additionally, this loss of muscle volume leads to the formation of vertical lip lines (smoker's lines), as the excess skin begins to gather into folds.
The most effective and safe way to restore and increase lip volume, as well as get rid of vertical lip lines, is to rebuild the volume of the orbicularis oris muscle.
The natural and proven method to achieve this is through muscle training.
The Nuvicor device tracks your muscle tension in real time, displays exercise goals, and provides voice prompts to ensure the most effective workout possible.


Figure 1
Step 1: Device Setup
1
Insert the batteries into the Nuvicor device.
2
Open the Nuvicor app on your phone.
3
Make sure the device is connected (a rapidly flashing indicator light confirms the connection).
Step 2: Preparation – Locating and Engaging the Muscle
1
How to engage the muscles: Roll your lips over your teeth and lock them into position by lightly biting down on them. Next, from this position, compress your lips together as if you are making the "O" sound.
2
Positioning: Place the two metal contacts against your lips (Fig. 2). Throughout the exercise, keep your finger pressed against the contact on the device housing at all times.

Figure 2
3
Visual Feedback: Open the PREVIEW window in the app. Purse your lips and watch the red bar on the left. It rises as your muscles contract and drops when they relax (Fig. 3). Repeat this slowly several times to ensure correct form.
4
Start: Press "OK" to begin the exercises.

Figure 3
Step 3: Muscle Test
1
Tap START TRAINING, review the instructions, and then tap START TEST.
2
Follow the voice prompts.
3
Tense your cheek muscle as hard as you can for 5 seconds. Repeat 3 times (Fig. 4).
4
Save your results.
Note: This step customizes the workout to your current strength level.

Figure 4
Step 4: Exercises
Exercise 1 — Goal: Build Muscle Volume
1
Follow the voice prompts. Tense the muscle 5 times, holding each contraction for 5 seconds.
2
Make sure the line on the graph rises above the red line (Fig. 5).
3
Pause and rest between repetitions.
4
Save your results.

Figure 5
Exercise 2 — Goal: Increase Muscle Strength
1
Hold the contraction for 20 seconds.
2
Try to keep the graph line within the colored zones (Fig. 6).
3
Focus on control rather than power.
4
Repeat the exercise and save your results.

Figure 6
Exercise 3 — Goal: Improve Muscle Tone
1
A video will be displayed during this exercise.
2
Maintain a steady, moderate muscle contraction.
3
The video will play only when there is sufficient muscle tension (Fig. 7-A).
4
If your muscle tension drops, the screen will turn black (Fig. 7-B).
5
Slightly increase the tension to resume playback.
Note: This exercise restores stable muscle tone through controlled tension and relaxation cycles.

Figure 7
Results Window
After completing the exercises, the session results screen will appear. It summarizes the performance of the trained muscle during the test and across all exercises (Fig. 8). You can save this screen as an image to your photo gallery by pressing the SAVE button.
The END OF SESSION button ends the session and returns you to the home screen (or main menu).

Figure 8
View History
Your progress results (Fig. 9) can be viewed by pressing the RESULTS button on any screen.

Figure 9